
Overview
Adding datafiles to an existing tablespace is a very simple and straight forward task. But if you want to remove one or more file(s) from a tablespace for any reason it is not as simple as you might imagine.
Initial Setting
For test purposes I need some additional space in an existing tablespace. After the tests I want to cleanup the tablespace too: I would like to remove the obsolete datafile from the tablespace to save diskspace. Commands such as ...
ALTER DATABASE DATAFILE 'file_name' OFFLINE DROP;
... are only disabling the datafile for further usage. But the datafile still remains in the list of datafiles and can not be removed from file system which is not what I really wanted. The following shows you the expensive way how to do this!
Step by Step
1.
Create new tablespace: The tablespace is needed temporarily to get all the remaining objects. The parameters must fit the existing tablespace.
CREATE TABLESPACE new_tablespace DATAFILE 'file_name' SIZE xxxK REUSE AUTOEXTEND OFF [EXTENT MANAGEMENT LOCAL UNIFORM SIZE xxxK] PERMANENT ONLINE;
2.
Move all objects from old tablespace to new tablespace: All remaining objects are move from the old tablesapce (with the obsolete datafile(s)) to the new created tablespace using corresponding commands for tables, partitions, or indexes.
ALTER TABLE table_name MOVE TABLESPACE new_tablespace;
ALTER TABLE table_name MOVE PARTITION partition_name TABLESPACE new_tablespace;
ALTER INDEX index_name REBUILD TABLESPACE new_tablespace;
3.
Drop old tablespace: Now the old tablespace should be empty and can be removed. This deletes the obsolete datafile(s) from data dictionary too! To be sure removing an empty tablespace you must omit the option INCLUDING CONTENTS.
DROP TABLESPACE old_tablespace;
4.
Recreate old tablespace: The original tablespace can be created again, reusing all the existing OS files minus the obsolete datafile(s).
5.
Move all objects back from new tablespace to old tablespace: All objects in the temporary tablespace must be moved back to the original tablespace.
6.
Drop new tablespace: The temporary tablespace (created in step 1) can be deleted.
7.
Check for invalid or unusable objects: Even if all objects are valid you might have INVALID or UNUSABLE indexes. Rebuild them!
-- Select invalid objectsCOLUMN object_name format a32
SELECT owner, SUBSTR(object_name, 1, 32) "OBJECT_NAME", status
FROM dba_objects
WHERE status != 'VALID'
AND owner NOT IN ('SYS','ORDSYS','ORDPLUGINS')
ORDER BY 1, 2;
---- Select invalid indexes
SELECT owner, table_name, index_name, status
FROM dba_indexes
WHERE status != 'VALID'
AND partitioned != 'YES'
AND owner NOT IN ('SYS','ORDSYS','ORDPLUGINS')
ORDER BY 1, 2, 3;
---- Select unusable partitioned indexes
SELECT index_owner, partition_name, index_name, status
FROM dba_ind_partitions
WHERE status != 'USABLE'
AND index_owner NOT IN ('SYS','ORDSYS','ORDPLUGINS')
ORDER BY 1, 2, 3;
8.
Cleanup OS file(s): Finally you can do what you initially wanted: Remove the obsolete datafile(s) from file system
Conclusion
Adding datafiles to an existing tablespace is very easy, removing is somehow tricky and error-prone. Much easier is the handling of whole tablespaces: In this case I would prefer adding some tablesapces for test purposes, do the tests, and remove the whole tablespaces afterwards
Friday, May 29, 2009
Tuesday, May 26, 2009
Manually Creating a Database in Oracle
Manually Database Creation is one of the most important works for DBA.
STEP 1: Create Required Directories
C:\>mkdir c:\oracle\oradata\mydb
C:\>mkdir c:\oracle\admin\mydb\bdump
C:\>mkdir c:\oracle\admin\mydb\udump
C:\>mkdir c:\oracle\admin\mydb\cdump
STEP 2: Create PASSWORDFILE for database authentication
C:\>ORAPWD file=c:\oracle\ora92\database\PWDmydb.ora password=oracle entries=5
STEP 3: Create INIT parameter file and set below parameter
open notepad or wordpad and type the following parameters and save it as initMYDB.ora in the ORACLE_HOME/database folder
eg:
c:\oracle\ora92\database\initMYDB.ora
init parameters
background_dump_dest=c:\oracle\admin\mydb\bdump
core_dump_dest=c:\oracle\admin\mydb\cdump
user_dump_dest=c:\oracle\admin\mydb\udump
control_files='c:\oracle\oradata\mydb\control01.ctl'
compatible=9.0.0
db_name=mydb
instance_name=mydb
remote_login_passwordfile=exclusive
STEP 4: Create Database Services
C:\>ORADIM -new -sid mydb -startmode auto
Connect with instance as SYSDBA
C:\>set oracle_sid=mydb
C:\>sqlplus "/as sysdba"
SQL*Plus: Release 9.2.0.1.0 - Production on Fri May 1 13:01:47 2009
Copyright (c) 1982, 2002, Oracle Corporation. All rights reserved.
Connected to an idle instance.
STEP 5: Startup the instance at NOMOUNT stage
SQL> startup nomount pfile=C:\oracle\ora92\database\initMYDB.ora
ORACLE instance started.
Total System Global Area 97589952 bytes
Fixed Size 453312 bytes
Variable Size 46137344 bytes
Database Buffers 50331648 bytes
Redo Buffers 667648 bytes
STEP 6: Issue the Create Database statement
SQL> @"C:\Documents and Settings\Administrator\Desktop\dbcreate.sql"
Database created.
dbcreate.sql script
create database mydb
logfile GROUP 1 ('c:\oracle\oradata\mydb\redo01.log') size 5m, GROUP 2 ('c:\oracle\oradata\mydb\redo02.log') size 5m
datafile
'c:\oracle\oradata\mydb\system01.dbf' size 200m
/
open the notepad and save this file as dbcreate.sql
STEP 7: Run Scripts to Build Data Dictionary views
SQL> @C:\oracle\ora92\rdbms\admin\catalog.sql
SQL> @C:\oracle\ora92\rdbms\admin\catproc.sql
STEP 8: Create Spfile from init.ora file.
SQL> create spfile from pfile='C:\oracle\ora92\database\initMYDB.ora';
File created.
SQL> shu immediate
Database closed.
Database dismounted.
ORACLE instance shut down.
SQL> startup
ORACLE instance started.
Total System Global Area 97589952 bytes
Fixed Size 453312 bytes
Variable Size 46137344 bytes
Database Buffers 50331648 bytes
Redo Buffers 667648 bytes
Database mounted.
Database opened.
creating undo tablespace
SQL> create undo tablespace undotbs
2 datafile 'c:\oracle\oradata\mydb\undo01.dbf' size 100m;
Tablespace created.
SQL> alter system set undo_management=auto scope=spfile;
System altered.
SQL> alter system set undo_tablespace=undotbs scope=spfile;
System altered.
SQL> startup force
ORACLE instance started.
Total System Global Area 97589952 bytes
Fixed Size 453312 bytes
Variable Size 46137344 bytes
Database Buffers 50331648 bytes
Redo Buffers 667648 bytes
Database mounted.
Database opened.
creating temporary tablespace
SQL> create temporary tablespace temptbs 2 tempfile 'c:\oracle\oradata\mydb\temp01.dbf' size 100m;
Tablespace created.
SQL> alter database default temporary tablespace temptbs;
Database altered.
creating tablespace for users
SQL> create tablespace users
2 datafile 'c:\oracle\oradata\mydb\user01.dbf' size 100m;
Tablespace created.
changing database from noarchivelog mode to archivelog
SQL> archive log list;
Database log mode No Archive Mode
Automatic archival Disabled
Archive destination C:\oracle\ora92\RDBMS
Oldest online log sequence 61
Current log sequence 62
step 1:
SQL> shu immediate;
step 2:
SQL> startup mount
step 3:
SQL> alter database archivelog;
Database altered.
step 4:
SQL> alter database open;
Database altered.
SQL> archive log list;
Database log mode Archive Mode
Automatic archival Disabled
Archive destination C:\oracle\ora92\RDBMS
Oldest online log sequence 61
Next log sequence to archive 62
Current log sequence 62
step 5:
SQL> alter system set log_archive_start=true scope=spfile;
System altered.
SQL> startup force
SQL> archive log list;
Database log mode Archive Mode
Automatic archival Enabled
Archive destination C:\oracle\ora92\RDBMS
Oldest online log sequence 62
Next log sequence to archive 63
Current log sequence 63
I HOPE THIS DOCUMENTATION WILL HELPS YOU DO CREATE A DATABASE.
THANKS FOR READING THIS DOCUMENTATION.
Wednesday, May 13, 2009
creating database with dbca
creation of database using database configuration assitant(DBCA):
steps for creating a database using dbca in a oracle server for both windows and linux environment follow the same procedure.
for linux:
open the terminal type dbca in the terminal
eg:
[oracle@localhost ~]$dbca
welcome screen will appear if not
[oracle@localhost ~]$$ORACLE_HOME/bin/dbca
for windows open command prompt and type dbca, welcome screen will appear
step 1:
 click NEXT to proceed.
step 2:
 select create a database option, by default it will be create a database only and click NEXT to proceed.
step 3:
select General Purpose and then click NEXT to proceed.
 step 4:
Enter your new database name eg:demo and click NEXT to proceed.
 step 4:
 step 5:
 step 6:
 step 7:
 step 8:
 step 9:
 step 10:
 step 11:
 step 12:
 click FINISH


now you can connect and work with your new database
[oracle@localhost ~]ORACLE_SID=demo
[oracle@localhost ~]sqlplus '/as sysdba'
SQL*Plus: Release 10.2.0.1.0 - Production on Wed May 13 00:45:19 2009
Copyright (c) 1982, 2005, Oracle. All rights reserved.
Connected to an idle instance.
SQL>startup
ORACLE instance started.
Total System Global Area 167772160 bytes
Fixed Size 1218316 bytes
Variable Size 79694068 bytes
Database Buffers 83886080 bytes
Redo Buffers 2973696 bytes
Database mounted.
Database opened.
SQL> select name from v$database;
NAME
---------
DEMO
Tuesday, May 12, 2009
Installing Oracle 9i in Linux RHEL4
Part I: Installing Linux
Minimum hardware requirement:
* Pentium IV processor
* 512MB of RAM
* minimum 40GB HARD DISK
1. Boot the server using the first CD.
* You may need to change your BIOS settings to allow booting from the CD.
2. The boot screen appears with the boot: prompt at the bottom of the screen.
* Select Enter to continue with a graphical install on the console. (For other installation methods and options, refer to the Red Hat Installation Guide.)
* The installer scans your hardware, briefly displays the Red Hat splash screen, and then begins a series of screen prompts.
3. Language Selection
* Accept the default.
4. Keyboard Configuration
* Accept the default.
5. Welcome Screen
* Click on Next.
6. Disk Partitioning Setup
* Do the disk partitioning as per the following
PARTITIONS MINIMUMSIZE
/ 12GB
/boot 100MB
/opt 4GB
/oracle 10GB
/tmp 3GB
swap double the size of RAM not more than 2GB
7. Boot Loader Configuration
* Accept the default.
8. Network Configuration
* It is usually best to configure database servers with a static IP address. To do so, click on Edit .
* A pop-up window appears. Uncheck the Configure using DHCP box, and enter the IP Address and Netmask for the server. Be sure that Activate on boot is checked, and click on OK .
* In the Hostname box, select manually and enter the hostname.
* In the Miscellaneous Settings box, enter the remaining network settings.
9. Firewall Configuration
* For the purposes of this walk-through, no firewall is configured. Select No firewall
* Select Disabled on the "Enable SELinux" drop down list.
* Click on Proceed when the "Warning - No Firewall" window appears.
10. Additional Language Support
* Accept the default.
11. Time Zone Selection
* Choose the time settings that are appropriate for your area. Setting the system clock to UTC is usually a good practice for servers. To do so, click on System clock uses UTC.
12. Set Root Password
* Enter a password for root, and enter it again to confirm.
13. Package Installation Defaults
* Select Customize software packages to be installed.
14. Package Group Selection
* Select only the package sets shown here and leave all others unselected.
* Desktop
o X Window System
o Gnome
* Applications
o Graphical Internet (optional)
* Servers
o Do not select anything in this group.
* Development
o Development Tools
* System
o Administration Tools
o System Tools
+ Add the package 'sysstat' by clicking on the Details link and selecting "sysstat - The sar an iostat system monitoring commands." from the Optional Packages list.
* Miscellaneous
o Do not select anything in this group.
* Click on Next to proceed.
15. Installing Packages
* Software will be copied to the hard disk and installed. Change disks as prompted.
16. Congratulations
* Remove the installation media from the system, and click on Reboot .
17. The system automatically reboots and presents a new welcome screen.
* Click on Next.
18. License Agreement
* Read the license agreement. If you agree to the terms, select Yes, I agree to the License Agreement and click on Next.
19. Date and Time
* Set the Date and Time.
* If you want to use an NTP server (recommended), select Enable Network Time Protocol and enter the name of the NTP server.
20. Display
* Accept the defaults or change as required.
21. Red Hat Login
* Enter your Red Hat Network login and password or create a new one.
22. System User
* Create an account for yourself.
* Do not create an account for oracle at this time. Creating the oracle account is covered later in this section.
23. Additional CDs
* Click on Next.
24. Finish Setup
* Click on Next.
25. A graphical login screen appears.
26. Congratulations! Your RHEL4 software is now installed.
27. Restart the system and logged in a root user, hence keeping the system ready to install Oracle 9i Release 2 on it.
2.Installation steps of oracle 9i:
Before Installing oracle, acquire the following softwares
1.Oracle 9i release 2(9.2.0.4.0) CD 1 OF 3.
2.Oracle 9i release 2(9.2.0.4.0) CD 2 of 3.
3.Oracle 9i release 2(9.2.0.4.0) CD 3 of 3.
4.Oracle 9i release 2(9.2.0.4.0) patch CD.
5.jdk1.5 update 6.
Download Oracle9i for Linux from the following web site:
http://otn.oracle.com/software/products/oracle9i/htdocs/linuxsoft.html
Download java for linux from the following website:
http://java.sun.com
Download oracle 9i patch cd from the following link:
 http://metalink.oracle.com
http://www.idevelopment.info/data/Oracle/DBA_tips/Linux/LINUX_8.shtml#Downloading%20/%20Unpacking%20the%20Oracle9i%20Installation%20Files
The following steps are for installing oracle 9i on RHEL4.
1.Install JDK1.5 in /usr/java folder by using the following command.
* create folder named javasoft on the Desktop.
* open a new terminal using the following command:
right click on the Desktop and click Open terminal from the popup menu.
* copy jdk-1_5_0_06-linux-i586.bin from the CD to /root/Desktop/javasoft folder, using the following commands.
Insert the CD containing jdk1.5 software
#mount /media/cdrom
#cp /media/cdrom/jdk-1_5_0_06-linux-i586.bin /root/Desktop/javasoft
*create a folder named java in the /usr folder.
#mkdir -p /usr/java
*Use the following commands to install jdk1.5
#cd /usr/java
#/root/Desktop/javasoft/jdk-1_5_0_06-linux-i586.bin
follow the steps as prompted to install the software.
*Create a symbolic link "jdk1.5" for easy accessibility using the following command:
#ln -s jdk-1_5_0_06 jdk1.5
*Do the permanent path setting for writing and executing the java programs without going to this folder every time.
#vi /etc/profile
Insert the following lines at the end of the file.
JAVA_HOME=/usr/java/jdk1.5
export JAVA_HOME
PATH=$JAVA_HOME/bin:$PATH
export PATH
*save and relogin as root user.
2.Open the terminal window on the linux desktop
3.Use the following commands to go to the home directory.
#cd /home
4.Insert the oracle 9i release CD no.1/3 to the CD Drive.
5.Mount the CD by the following command:
#mount /media/cdrom
6.Confirm the availability of the .cpio file the CD using the following command:
#ls /media/cdrom
7.Use the following command to extract the software from CD 1 of oracle
#cpio -idmv < /media/cdrom/ship_9204_linux_disk1.cpio
note: once you do this a folder named Disk1 will be created in /home directory
8.Unmount the CD using the following command:
#umount /media/cdrom
9.Insert the oracle 9i release CD no.2/3 to the CD Drive.
10.Mount the CD by the following command:
#mount /media/cdrom
11.Confirm the availability of the .cpio file the CD using the following command:
#ls /media/cdrom
12.Use the following command to extract the software from CD 2 of oracle
#cpio -idmv < /media/cdrom/ship_9204_linux_disk2.cpio
note: once you do this a folder named Disk2 will be created in /home directory
13.Unmount the CD using the following command:
#umount /media/cdrom
14.Insert the oracle 9i release CD no.3/3 to the CD Drive.
15.Mount the CD by the following command:
#mount /media/cdrom
16.Confirm the availability of the .cpio file the CD using the following command:
#ls /media/cdrom
17.Use the following command to extract the software from CD 3 of oracle
#cpio -idmv < /media/cdrom/ship_9204_linux_disk3.cpio
note: once you do this a folder named Disk3 will be created in /home directory
18.Unmount the CD using the following command:
#umount /media/cdrom
19.For patch use the following commands:
#mkdir 92040
20.Insert the patch CD to the CD Drive.
21.Mount the CD using following command:
#mount /media/cdrom
22.Use the following command to unzip the files
#unzip -d /home/92040 /media/cdrom/p3006854_9204_LINUX.zip
23.After issuing the above command, it will create a folder named as 3006854 in the /home/92040 directory. please confirm the same.
24.Issue the following commands to extract the p4198954 patch.
#unzip -d /home/92040 /media/cdrom/p4198954_40_LINUX.zip
you will able to see the following rpms within the specified folder.
1) compact-orcle-rhel4-1-0-5.i386.rpm
2) compact-libcwait-2.1-1.i386.rpm
As soon as you try to install these RPM's then you will receive dependency failure.
Use the following steps to avoid dependency failure:
1)Insert the RHEL4 CD no.3 to the CD Drive.
2)Mount the CD using the following command:
#mount /media/cdrom
#cd /media/cdrom/RedHat/RPMS
3)Execute the following RPMs
#rpm -ivh --aid libaio-devel-0.3.102-1.i386.rpm
#rpm -ivh --aid openmotif21-2.1.30-11.RHEL4.2.i386.rpm
4)After successful execution of the above RPMs, execute the RPMs already unzipped from the 4198954 patch.
#cd /home/92040
#rpm -ivh compat-oracle-rhel4-1.0.5.i386.rpm
#rpm -ivh compat-libcwait-2.1-1.i386.rpm
5)unmount the 3rd CD of RHEL4 using the following command
#unmount /media/cdrom
25.Configuring the Linux Kernel Parameters, update the /etc/sysctl.conf file,by adding the following lines towards the end of the file.
#vi /etc/sysctl.conf
kernel.shmall = 2097152
kernel.shmmax = 536870912
kernel.shmmni = 4096
kernel.sem = 250 32000 100 128
fs.file-max = 65536
net.ipv4.ip_local_port_range = 1024 65000
net.core.rmem_default=262144
net.core.wmem_default=262144
net.core.rmem_max=262144
net.core.wmem_max=26214
save the file and relogin.
26.Create the Oracle Groups and User Account:
# groupadd oinstall
# groupadd dba
# groupadd oper
# useradd -g oinstall -G dba oracle
# id oracle
Set the password on the oracle account:
# passwd oracle
Changing password for user oracle.
New password:
Retype new password:
passwd: all authentication tokens updated successfully.
27.Create Directories for oracle software.
# mkdir -p /oracle/app/oracle/product/9.2.0.4.0
# chown -R oracle:oinstall /oracle
# chmod -R 775 /oracle
28.Login as the oracle user and add the following lines at the end of the .bash_profile file:
#vi .bash_profile
ORACLE_BASE=/oracle/app/oracle; export ORACLE_BASE
ORACLE_HOME=$ORACLE_BASE/product/9.2.0.4.0; export ORACLE_HOME
ORACLE_TERM=xterm; export ORACLE_TERM
PATH=$ORACLE_HOME/bin:$PATH:/usr/java/jdk1.5/bin; export PATH
ORACLE_OWNER=oracle; export ORACLE_OWNER
ORACLE_SID=jay; export ORACLE_SID
LD_LIBRARY_PATH=$ORACLE_HOME/lib; export LD_LIBRARY_PATH
CLASSPATH=$ORACLE_HOME/JRE:$ORACLE_HOME/jlib:$ORACLE_HOME/rdbms/jlib;
export CLASSPATH
ORACLE_OEM_JAVARUNTIME=/usr/java/jdk1.5; export ORACLE_OEM_JAVARUNTIME
LD_ASSUME_KERNEL=2.4.19; export LD_ASSUME_KERNEL
THREADS_FLAG=native; export THREADS_FLAG
TMP=/tmp; export TMP
TMPDIR=$TMP; export TMPDIR
29.Save the .bash_profile file and relogin as oracle user.
30.Make sure the .bash_profile file ran correctly by issuing the following command:
$set | more
31.Login to Root using this command:
$su -
password:rootpassword
#
32.Execute the 3006854 patch using the following command:
#sh /home/92040/3006854/rhel3_pre_install.sh
33.Exit from the Root.
#exit
$(After typing exit you will receive the oracle login $ prompt)
34.Start the universal installer using the following command:
$/home/Disk1/runInstaller
note: This will start the universal installer. Follow the steps in the wizard to install oracle software.
NOTE: During the installation enter the appropriate ORACLE_HOME and name then continue as normal
1. Welcome Screen:
Click Next
2.Inventory Location:
"/oracle/app/oracle/oraInventory"and Click Next
3.Unix Group Name:
Use "oinstall" and click Next
When asked to run /tmp/orainstRoot.sh, run it before you click Continue
open a new terminal,by click the desktop
$su -
password:root password
#cd /tmp
#./orainstRoot.sh
once this execution is over and you get back the prompt, switch to the dialog box in the Universal Installer and continue next.
5.File Locations:
name:use default value
path:/oracle/app/oracle/product/9.2.0.4.0
6.Available Products:
Select "Oracle9i Database 9.2.0.1.0"
7.Installation Types:
Select "Enterprise Edition(2.84GB)
8.Database configuration:
Select "General Purpose"
9.Database Identification
Global Database Name:jay
SID:jay
and then Click Next
10.Database File Locations:
Directory for Database Files:/oracle/app/oracle/oradata
and then click Next
11.Database Character Set:
Use the default character set
and then click Next
12.Summary:
Start the Install
13.Setup privileges:
before completing the installation the universal installer will prompt another file to be executed from the root login.
follow the sequence commands to overcome this:
open the terminal
$su -
password:root password
#cd /oracle/app/oracle/product/9.2.0.4.0
#./root.sh
it will prompt for a path, press enter to keep it default.
after that press ok in the dialog box.
14.Configuration tools:
if any error comes, Simply ignore it.
15.Database Configuration Assistant:
enter password for sys and system and click OK
16. At the end of the installation, exit runInstaller.
Minimum hardware requirement:
* Pentium IV processor
* 512MB of RAM
* minimum 40GB HARD DISK
1. Boot the server using the first CD.
* You may need to change your BIOS settings to allow booting from the CD.
2. The boot screen appears with the boot: prompt at the bottom of the screen.
* Select Enter to continue with a graphical install on the console. (For other installation methods and options, refer to the Red Hat Installation Guide.)
* The installer scans your hardware, briefly displays the Red Hat splash screen, and then begins a series of screen prompts.
3. Language Selection
* Accept the default.
4. Keyboard Configuration
* Accept the default.
5. Welcome Screen
* Click on Next.
6. Disk Partitioning Setup
* Do the disk partitioning as per the following
PARTITIONS MINIMUMSIZE
/ 12GB
/boot 100MB
/opt 4GB
/oracle 10GB
/tmp 3GB
swap double the size of RAM not more than 2GB
7. Boot Loader Configuration
* Accept the default.
8. Network Configuration
* It is usually best to configure database servers with a static IP address. To do so, click on Edit .
* A pop-up window appears. Uncheck the Configure using DHCP box, and enter the IP Address and Netmask for the server. Be sure that Activate on boot is checked, and click on OK .
* In the Hostname box, select manually and enter the hostname.
* In the Miscellaneous Settings box, enter the remaining network settings.
9. Firewall Configuration
* For the purposes of this walk-through, no firewall is configured. Select No firewall
* Select Disabled on the "Enable SELinux" drop down list.
* Click on Proceed when the "Warning - No Firewall" window appears.
10. Additional Language Support
* Accept the default.
11. Time Zone Selection
* Choose the time settings that are appropriate for your area. Setting the system clock to UTC is usually a good practice for servers. To do so, click on System clock uses UTC.
12. Set Root Password
* Enter a password for root, and enter it again to confirm.
13. Package Installation Defaults
* Select Customize software packages to be installed.
14. Package Group Selection
* Select only the package sets shown here and leave all others unselected.
* Desktop
o X Window System
o Gnome
* Applications
o Graphical Internet (optional)
* Servers
o Do not select anything in this group.
* Development
o Development Tools
* System
o Administration Tools
o System Tools
+ Add the package 'sysstat' by clicking on the Details link and selecting "sysstat - The sar an iostat system monitoring commands." from the Optional Packages list.
* Miscellaneous
o Do not select anything in this group.
* Click on Next to proceed.
15. Installing Packages
* Software will be copied to the hard disk and installed. Change disks as prompted.
16. Congratulations
* Remove the installation media from the system, and click on Reboot .
17. The system automatically reboots and presents a new welcome screen.
* Click on Next.
18. License Agreement
* Read the license agreement. If you agree to the terms, select Yes, I agree to the License Agreement and click on Next.
19. Date and Time
* Set the Date and Time.
* If you want to use an NTP server (recommended), select Enable Network Time Protocol and enter the name of the NTP server.
20. Display
* Accept the defaults or change as required.
21. Red Hat Login
* Enter your Red Hat Network login and password or create a new one.
22. System User
* Create an account for yourself.
* Do not create an account for oracle at this time. Creating the oracle account is covered later in this section.
23. Additional CDs
* Click on Next.
24. Finish Setup
* Click on Next.
25. A graphical login screen appears.
26. Congratulations! Your RHEL4 software is now installed.
27. Restart the system and logged in a root user, hence keeping the system ready to install Oracle 9i Release 2 on it.
2.Installation steps of oracle 9i:
Before Installing oracle, acquire the following softwares
1.Oracle 9i release 2(9.2.0.4.0) CD 1 OF 3.
2.Oracle 9i release 2(9.2.0.4.0) CD 2 of 3.
3.Oracle 9i release 2(9.2.0.4.0) CD 3 of 3.
4.Oracle 9i release 2(9.2.0.4.0) patch CD.
5.jdk1.5 update 6.
Download Oracle9i for Linux from the following web site:
http://otn.oracle.com/software/products/oracle9i/htdocs/linuxsoft.html
Download java for linux from the following website:
http://java.sun.com
Download oracle 9i patch cd from the following link:
The following steps are for installing oracle 9i on RHEL4.
1.Install JDK1.5 in /usr/java folder by using the following command.
* create folder named javasoft on the Desktop.
* open a new terminal using the following command:
right click on the Desktop and click Open terminal from the popup menu.
* copy jdk-1_5_0_06-linux-i586.bin from the CD to /root/Desktop/javasoft folder, using the following commands.
Insert the CD containing jdk1.5 software
#mount /media/cdrom
#cp /media/cdrom/jdk-1_5_0_06-linux-i586.bin /root/Desktop/javasoft
*create a folder named java in the /usr folder.
#mkdir -p /usr/java
*Use the following commands to install jdk1.5
#cd /usr/java
#/root/Desktop/javasoft/jdk-1_5_0_06-linux-i586.bin
follow the steps as prompted to install the software.
*Create a symbolic link "jdk1.5" for easy accessibility using the following command:
#ln -s jdk-1_5_0_06 jdk1.5
*Do the permanent path setting for writing and executing the java programs without going to this folder every time.
#vi /etc/profile
Insert the following lines at the end of the file.
JAVA_HOME=/usr/java/jdk1.5
export JAVA_HOME
PATH=$JAVA_HOME/bin:$PATH
export PATH
*save and relogin as root user.
2.Open the terminal window on the linux desktop
3.Use the following commands to go to the home directory.
#cd /home
4.Insert the oracle 9i release CD no.1/3 to the CD Drive.
5.Mount the CD by the following command:
#mount /media/cdrom
6.Confirm the availability of the .cpio file the CD using the following command:
#ls /media/cdrom
7.Use the following command to extract the software from CD 1 of oracle
#cpio -idmv < /media/cdrom/ship_9204_linux_disk1.cpio
note: once you do this a folder named Disk1 will be created in /home directory
8.Unmount the CD using the following command:
#umount /media/cdrom
9.Insert the oracle 9i release CD no.2/3 to the CD Drive.
10.Mount the CD by the following command:
#mount /media/cdrom
11.Confirm the availability of the .cpio file the CD using the following command:
#ls /media/cdrom
12.Use the following command to extract the software from CD 2 of oracle
#cpio -idmv < /media/cdrom/ship_9204_linux_disk2.cpio
note: once you do this a folder named Disk2 will be created in /home directory
13.Unmount the CD using the following command:
#umount /media/cdrom
14.Insert the oracle 9i release CD no.3/3 to the CD Drive.
15.Mount the CD by the following command:
#mount /media/cdrom
16.Confirm the availability of the .cpio file the CD using the following command:
#ls /media/cdrom
17.Use the following command to extract the software from CD 3 of oracle
#cpio -idmv < /media/cdrom/ship_9204_linux_disk3.cpio
note: once you do this a folder named Disk3 will be created in /home directory
18.Unmount the CD using the following command:
#umount /media/cdrom
19.For patch use the following commands:
#mkdir 92040
20.Insert the patch CD to the CD Drive.
21.Mount the CD using following command:
#mount /media/cdrom
22.Use the following command to unzip the files
#unzip -d /home/92040 /media/cdrom/p3006854_9204_LINUX.zip
23.After issuing the above command, it will create a folder named as 3006854 in the /home/92040 directory. please confirm the same.
24.Issue the following commands to extract the p4198954 patch.
#unzip -d /home/92040 /media/cdrom/p4198954_40_LINUX.zip
you will able to see the following rpms within the specified folder.
1) compact-orcle-rhel4-1-0-5.i386.rpm
2) compact-libcwait-2.1-1.i386.rpm
As soon as you try to install these RPM's then you will receive dependency failure.
Use the following steps to avoid dependency failure:
1)Insert the RHEL4 CD no.3 to the CD Drive.
2)Mount the CD using the following command:
#mount /media/cdrom
#cd /media/cdrom/RedHat/RPMS
3)Execute the following RPMs
#rpm -ivh --aid libaio-devel-0.3.102-1.i386.rpm
#rpm -ivh --aid openmotif21-2.1.30-11.RHEL4.2.i386.rpm
4)After successful execution of the above RPMs, execute the RPMs already unzipped from the 4198954 patch.
#cd /home/92040
#rpm -ivh compat-oracle-rhel4-1.0.5.i386.rpm
#rpm -ivh compat-libcwait-2.1-1.i386.rpm
5)unmount the 3rd CD of RHEL4 using the following command
#unmount /media/cdrom
25.Configuring the Linux Kernel Parameters, update the /etc/sysctl.conf file,by adding the following lines towards the end of the file.
#vi /etc/sysctl.conf
kernel.shmall = 2097152
kernel.shmmax = 536870912
kernel.shmmni = 4096
kernel.sem = 250 32000 100 128
fs.file-max = 65536
net.ipv4.ip_local_port_range = 1024 65000
net.core.rmem_default=262144
net.core.wmem_default=262144
net.core.rmem_max=262144
net.core.wmem_max=26214
save the file and relogin.
26.Create the Oracle Groups and User Account:
# groupadd oinstall
# groupadd dba
# groupadd oper
# useradd -g oinstall -G dba oracle
# id oracle
Set the password on the oracle account:
# passwd oracle
Changing password for user oracle.
New password:
Retype new password:
passwd: all authentication tokens updated successfully.
27.Create Directories for oracle software.
# mkdir -p /oracle/app/oracle/product/9.2.0.4.0
# chown -R oracle:oinstall /oracle
# chmod -R 775 /oracle
28.Login as the oracle user and add the following lines at the end of the .bash_profile file:
#vi .bash_profile
ORACLE_BASE=/oracle/app/oracle; export ORACLE_BASE
ORACLE_HOME=$ORACLE_BASE/product/9.2.0.4.0; export ORACLE_HOME
ORACLE_TERM=xterm; export ORACLE_TERM
PATH=$ORACLE_HOME/bin:$PATH:/usr/java/jdk1.5/bin; export PATH
ORACLE_OWNER=oracle; export ORACLE_OWNER
ORACLE_SID=jay; export ORACLE_SID
LD_LIBRARY_PATH=$ORACLE_HOME/lib; export LD_LIBRARY_PATH
CLASSPATH=$ORACLE_HOME/JRE:$ORACLE_HOME/jlib:$ORACLE_HOME/rdbms/jlib;
export CLASSPATH
ORACLE_OEM_JAVARUNTIME=/usr/java/jdk1.5; export ORACLE_OEM_JAVARUNTIME
LD_ASSUME_KERNEL=2.4.19; export LD_ASSUME_KERNEL
THREADS_FLAG=native; export THREADS_FLAG
TMP=/tmp; export TMP
TMPDIR=$TMP; export TMPDIR
29.Save the .bash_profile file and relogin as oracle user.
30.Make sure the .bash_profile file ran correctly by issuing the following command:
$set | more
31.Login to Root using this command:
$su -
password:rootpassword
#
32.Execute the 3006854 patch using the following command:
#sh /home/92040/3006854/rhel3_pre_install.sh
33.Exit from the Root.
#exit
$(After typing exit you will receive the oracle login $ prompt)
34.Start the universal installer using the following command:
$/home/Disk1/runInstaller
note: This will start the universal installer. Follow the steps in the wizard to install oracle software.
NOTE: During the installation enter the appropriate ORACLE_HOME and name then continue as normal
1. Welcome Screen:
Click Next
2.Inventory Location:
"/oracle/app/oracle/oraInventory"and Click Next
3.Unix Group Name:
Use "oinstall" and click Next
When asked to run /tmp/orainstRoot.sh, run it before you click Continue
open a new terminal,by click the desktop
$su -
password:root password
#cd /tmp
#./orainstRoot.sh
once this execution is over and you get back the prompt, switch to the dialog box in the Universal Installer and continue next.
5.File Locations:
name:use default value
path:/oracle/app/oracle/product/9.2.0.4.0
6.Available Products:
Select "Oracle9i Database 9.2.0.1.0"
7.Installation Types:
Select "Enterprise Edition(2.84GB)
8.Database configuration:
Select "General Purpose"
9.Database Identification
Global Database Name:jay
SID:jay
and then Click Next
10.Database File Locations:
Directory for Database Files:/oracle/app/oracle/oradata
and then click Next
11.Database Character Set:
Use the default character set
and then click Next
12.Summary:
Start the Install
13.Setup privileges:
before completing the installation the universal installer will prompt another file to be executed from the root login.
follow the sequence commands to overcome this:
open the terminal
$su -
password:root password
#cd /oracle/app/oracle/product/9.2.0.4.0
#./root.sh
it will prompt for a path, press enter to keep it default.
after that press ok in the dialog box.
14.Configuration tools:
if any error comes, Simply ignore it.
15.Database Configuration Assistant:
enter password for sys and system and click OK
16. At the end of the installation, exit runInstaller.
clone database using Hot backup
Clone an Oracle database using an online/hot backup
This procedure will clone a database using a online copy of the source database files.
PART I
You have to follow steps 1 to step 8 is a prerequisite steps for creating clone database.
* 1. Make a note of the current archive log change number
Because the restored files will require recovery, some archive logs will be needed. This applies even if you are not intending to put the cloned database into archive log mode. Work out which will be the first required log by running the following query on the source database. Make a note of the change number that is returned:
SQL> select max(first_change#) chng
from v$archived_log
/
* 2. Prepare the begin/end backup scripts
The following sql will produce two scripts; begin_backup.sql and end_backup.sql. When executed, these scripts will either put the tablespaces into backup mode or take them out of it:
SQL> spool begin_backup.sql
select 'alter tablespace ' || tablespace_name || ' begin backup;' tsbb
from dba_tablespaces
where contents != 'TEMPORARY'
order by tablespace_name
/
SQL> spool off
SQL>spool end_backup.sql
select 'alter tablespace ' || tablespace_name || ' end backup;' tseb
from dba_tablespaces
where contents != 'TEMPORARY'
order by tablespace_name
/
SQL>spool off
* 3. Put the source database into backup mode
From sqlplus, run the begin backup script created in the last step:
SQL> @begin_backup
This will put all of the databases tablespaces into backup mode.
* 4. Copy the files to the new location
Copy, scp or ftp the files from the source database/machine to the target. Do not copy the control files across. Make sure that the files have the correct permissions and ownership.
* 5. Take the source database out of backup mode
Once the file copy has been completed, take the source database out of backup mode. Run the end backup script created in step 2. From sqlplus:
SQL>@end_backup
* 6. Copy archive logs
It is only necessary to copy archive logs created during the time the source database was in backup mode. Begin by archiving the current redo:
SQL> alter system archive log current;
Then, identify which archive log files are required. When run, the following query will ask for a change number. This is the number noted in step 1.
SQL> select name
from v$archived_log
where first_change# >= &change_no
order by name
/
Create an archive directory in the clone database.s file system and copy all of the identified logs into it.
* 7. Produce a pfile for the new database
This step assumes that you are using a spfile. If you are not, just copy the existing pfile.
From sqlplus:
SQL> create pfile='/u01/admin/clone/pfile/init.ora' from spfile;
This will create a new pfile in the /u01/admin/clone/pfile directory.
Once created, the new pfile will need to be edited. If the cloned database is to have a new name, this will need to be changed, as will any paths. Review the contents of the file and make alterations as necessary. Also think about adjusting memory parameters. If you are cloning a production database onto a slower development machine you might want to consider reducing some values.
Ensure that the archive log destination is pointing to the directory created in step 6.
* 8. Create the clone controlfile
Create a control file for the new database. To do this, connect to the source database and request a dump of the current control file. From sqlplus:
SQL> alter database backup controlfile to trace;
The file will require extensive editing before it can be used. Using your favourite editor make the following alterations:
o Remove all lines from the top of the file including the second 'STARTUP MOUNT' line (it's roughly halfway down the file).
o Remove any lines that start with --
o Remove any lines that start with a #
o Remove any blank lines in the 'CREATE CONTROLFILE' section.
o Remove the line 'RECOVER DATABASE USING BACKUP CONTROLFILE'
o Remove the line 'ALTER DATABASE OPEN RESETLOGS;'
o Make a copy of the 'ALTER TABLESPACE TEMP...' lines, and then remove them from the file. Make sure that you hang onto the command, it will be used later.
o Move to the top of the file to the 'CREATE CONTROLFILE' line. The word 'REUSE' needs to be changed to 'SET'. The database name needs setting to the new database name (if it is being changed). Decide whether the database will be put into archivelog mode or not.
o If the file paths are being changed, alter the file to reflect the changes.
Here is an example of how the file would look for a small database called CLONE which isn't in archivelog mode:
CREATE CONTROLFILE set DATABASE "clone" RESETLOGS NOARCHIVELOG
MAXLOGFILES 16
MAXLOGMEMBERS 3
MAXDATAFILES 100
MAXINSTANCES 8
MAXLOGHISTORY 292
LOGFILE
GROUP 1 '/u01/app/oracle/product/10.2.0/oradata/clone/redo01.log' SIZE 50M,
GROUP 2 '/u01/app/oracle/product/10.2.0/oradata/clone/redo02.log' SIZE 50M,
GROUP 3 '/u01/app/oracle/product/10.2.0/oradata/clone/redo03.log' SIZE 50M
-- STANDBY LOGFILE
DATAFILE
'/u01/app/oracle/product/10.2.0/oradata/clone/system01.dbf',
'/u01/app/oracle/product/10.2.0/oradata/clone/undotbs01.dbf',
'/u01/app/oracle/product/10.2.0/oradata/clone/sysaux01.dbf',
'/u01/app/oracle/product/10.2.0/oradata/clone/users01.dbf',
'/u01/app/oracle/product/10.2.0/oradata/clone/example01.dbf'
CHARACTER SET WE8ISO8859P1
;
IMPORTANT: SAVE THIS FILE IN YOUR HOME DIRECTORY AS dbclone.sql
PART II
This are the steps to launch clone database
* 9. Add a new entry to oratab and source the environment
Edit the /etc/oratab (or /opt/oracle/oratab) and add an entry for the new database.
Source the new environment with '. oraenv' and verify that it has worked by issuing the following command:
echo $ORACLE_SID
If this doesn't output the new database sid go back and investigate.
* 10. Create the a password file
Use the following command to create a password file (add an appropriate password to the end of it):
orapwd file=${ORACLE_HOME}/dbs/orapw${ORACLE_SID} password=
* 11. Create the new control file(s)
Ok, now for the exciting bit! It is time to create the new controlfiles and open the database:
open new terminal and follow the steps:
[oracle@localhost ~]$ ORACLE_SID=clone
[oracle@localhost ~]$ sqlplus '/as sysdba'
SQL*Plus: Release 10.2.0.1.0 - Production on Tue May 12 18:54:56 2009
Copyright (c) 1982, 2005, Oracle. All rights reserved.
Connected to:
Oracle Database 10g Enterprise Edition Release 10.2.0.1.0 - Production
With the Partitioning, OLAP and Data Mining options
SQL> startup nomount pfile=/u01/admin/clone/pfile/init.ora
SQL> @/home/oracle/dbclone.sql
If all goes to plan you will see the instance start and then the message 'Control file created'.
* 12. Recover and open the database
The archive logs that were identified and copied in step 6 must now be applied to the database. Issue the following command from sqlplus:
SQL> recover database using BACKUP CONTROLFILE until cancel;
ORA-00279: change 542839 generated at 05/12/2009 02:38:29 needed for thread 1
ORA-00289: suggestion :
/u01/app/oracle/product/10.2.0/db_1/flash_recovery_area/CLONE/archivelog/2008_11_
25/o1_mf_1_3_%u_.arc
ORA-00280: change 542839 for thread 1 is in sequence #3
Specify log: {=suggested | filename | AUTO | CANCEL}
IMPORTANT:You need to give the archived log name here and then say "Cancel" and open the database
/u01/app/oracle/oradata/CLONE/o1_mf_1_3_4lqgzpsg_.arc
ORA-00279: change 543072 generated at 11/25/2008 02:48:54 needed for thread 1
ORA-00289: suggestion :
/u01/app/oracle/product/10.2.0/db_1/flash_recovery_area/CLONE/archivelog/2008_11_
25/o1_mf_1_4_%u_.arc
ORA-00280: change 543072 for thread 1 is in sequence #4
ORA-00278: log file '/u01/app/oracle/oradata/CLONE/o1_mf_1_3_4lqgzpsg_.arc' no
longer needed for this recovery
Specify log: {=suggested | filename | AUTO | CANCEL}
/u01/app/oracle/oradata/CLONE/o1_mf_1_4_4lqgzsbq_.arc
ORA-00279: change 543074 generated at 11/25/2008 02:48:57 needed for thread 1
ORA-00289: suggestion :
/u01/app/oracle/product/10.2.0/db_1/flash_recovery_area/CLONE/archivelog/2008_11_
25/o1_mf_1_5_%u_.arc
ORA-00280: change 543074 for thread 1 is in sequence #5
ORA-00278: log file '/u01/app/oracle/oradata/CLONE/o1_mf_1_4_4lqgzsbq_.arc' no
longer needed for this recovery
Specify log: {=suggested | filename | AUTO | CANCEL}
cancel
Media recovery cancelled.
SQL> alter database open resetlogs;
AND THEN MAKE YOUR DATABASE TO ARCHIVELOG MODE
* 13. Create temp files
Using the 'ALTER TABLESPACE TEMP...' command from step 8, create the temp files. Make sure the paths to the file(s) are correct, then run it from sqlplus.
* 14. Perform a few checks
If the last couple of steps went smoothly, the database should be open. It is advisable to perform a few checks at this point:
o Check that the database has opened with:
SQL>select status from v$instance;
The status should be 'OPEN'
o Make sure that the datafiles are all ok:
SQL>select distinct status from v$datafile;
It should return only ONLINE and SYSTEM.
o Take a quick look at the alert log too.
* 15. Set the databases global name
The new database will still have the source databases global name. Run the following to reset it:
SQL>alter database rename global_name to
/
Note. no quotes!
* 16. Create a spfile
From sqlplus:
SQL>create spfile from pfile;
* 17. Change the database ID
If RMAN is going to be used to back-up the database, the database ID must be changed. If RMAN isn't going to be used, there is no harm in changing the ID anyway - and it's a good practice to do so.
From sqlplus:
SQL>shutdown immediate
SQL>startup mount
SQL>exit
From unix and linux:
nid target=/
NID will ask if you want to change the ID. Respond with 'Y'. Once it has finished, start the database up again in sqlplus:
SQL>shutdown immediate
SQL>startup mount
SQL>alter database open resetlogs
/
* 18. Configure TNS
Add entries for new database in the listener.ora and tnsnames.ora as necessary.
* 19. Finished
That's it!
Original documentation prepard by shutdownabort.com, Andrew Barry, I have made some changes in that documentation for easy understanding with the help of ASKDBA ORACLE FEED forum.
for further reference and more information:
http://www.shutdownabort.com/quickguides/clone_hot.php
http://askdba.org/forum/topic.php?id=18
This procedure will clone a database using a online copy of the source database files.
PART I
You have to follow steps 1 to step 8 is a prerequisite steps for creating clone database.
* 1. Make a note of the current archive log change number
Because the restored files will require recovery, some archive logs will be needed. This applies even if you are not intending to put the cloned database into archive log mode. Work out which will be the first required log by running the following query on the source database. Make a note of the change number that is returned:
SQL> select max(first_change#) chng
from v$archived_log
/
* 2. Prepare the begin/end backup scripts
The following sql will produce two scripts; begin_backup.sql and end_backup.sql. When executed, these scripts will either put the tablespaces into backup mode or take them out of it:
SQL> spool begin_backup.sql
select 'alter tablespace ' || tablespace_name || ' begin backup;' tsbb
from dba_tablespaces
where contents != 'TEMPORARY'
order by tablespace_name
/
SQL> spool off
SQL>spool end_backup.sql
select 'alter tablespace ' || tablespace_name || ' end backup;' tseb
from dba_tablespaces
where contents != 'TEMPORARY'
order by tablespace_name
/
SQL>spool off
* 3. Put the source database into backup mode
From sqlplus, run the begin backup script created in the last step:
SQL> @begin_backup
This will put all of the databases tablespaces into backup mode.
* 4. Copy the files to the new location
Copy, scp or ftp the files from the source database/machine to the target. Do not copy the control files across. Make sure that the files have the correct permissions and ownership.
* 5. Take the source database out of backup mode
Once the file copy has been completed, take the source database out of backup mode. Run the end backup script created in step 2. From sqlplus:
SQL>@end_backup
* 6. Copy archive logs
It is only necessary to copy archive logs created during the time the source database was in backup mode. Begin by archiving the current redo:
SQL> alter system archive log current;
Then, identify which archive log files are required. When run, the following query will ask for a change number. This is the number noted in step 1.
SQL> select name
from v$archived_log
where first_change# >= &change_no
order by name
/
Create an archive directory in the clone database.s file system and copy all of the identified logs into it.
* 7. Produce a pfile for the new database
This step assumes that you are using a spfile. If you are not, just copy the existing pfile.
From sqlplus:
SQL> create pfile='/u01/admin/clone/pfile/init.ora' from spfile;
This will create a new pfile in the /u01/admin/clone/pfile directory.
Once created, the new pfile will need to be edited. If the cloned database is to have a new name, this will need to be changed, as will any paths. Review the contents of the file and make alterations as necessary. Also think about adjusting memory parameters. If you are cloning a production database onto a slower development machine you might want to consider reducing some values.
Ensure that the archive log destination is pointing to the directory created in step 6.
* 8. Create the clone controlfile
Create a control file for the new database. To do this, connect to the source database and request a dump of the current control file. From sqlplus:
SQL> alter database backup controlfile to trace;
The file will require extensive editing before it can be used. Using your favourite editor make the following alterations:
o Remove all lines from the top of the file including the second 'STARTUP MOUNT' line (it's roughly halfway down the file).
o Remove any lines that start with --
o Remove any lines that start with a #
o Remove any blank lines in the 'CREATE CONTROLFILE' section.
o Remove the line 'RECOVER DATABASE USING BACKUP CONTROLFILE'
o Remove the line 'ALTER DATABASE OPEN RESETLOGS;'
o Make a copy of the 'ALTER TABLESPACE TEMP...' lines, and then remove them from the file. Make sure that you hang onto the command, it will be used later.
o Move to the top of the file to the 'CREATE CONTROLFILE' line. The word 'REUSE' needs to be changed to 'SET'. The database name needs setting to the new database name (if it is being changed). Decide whether the database will be put into archivelog mode or not.
o If the file paths are being changed, alter the file to reflect the changes.
Here is an example of how the file would look for a small database called CLONE which isn't in archivelog mode:
CREATE CONTROLFILE set DATABASE "clone" RESETLOGS NOARCHIVELOG
MAXLOGFILES 16
MAXLOGMEMBERS 3
MAXDATAFILES 100
MAXINSTANCES 8
MAXLOGHISTORY 292
LOGFILE
GROUP 1 '/u01/app/oracle/product/10.2.0/oradata/clone/redo01.log' SIZE 50M,
GROUP 2 '/u01/app/oracle/product/10.2.0/oradata/clone/redo02.log' SIZE 50M,
GROUP 3 '/u01/app/oracle/product/10.2.0/oradata/clone/redo03.log' SIZE 50M
-- STANDBY LOGFILE
DATAFILE
'/u01/app/oracle/product/10.2.0/oradata/clone/system01.dbf',
'/u01/app/oracle/product/10.2.0/oradata/clone/undotbs01.dbf',
'/u01/app/oracle/product/10.2.0/oradata/clone/sysaux01.dbf',
'/u01/app/oracle/product/10.2.0/oradata/clone/users01.dbf',
'/u01/app/oracle/product/10.2.0/oradata/clone/example01.dbf'
CHARACTER SET WE8ISO8859P1
;
IMPORTANT: SAVE THIS FILE IN YOUR HOME DIRECTORY AS dbclone.sql
PART II
This are the steps to launch clone database
* 9. Add a new entry to oratab and source the environment
Edit the /etc/oratab (or /opt/oracle/oratab) and add an entry for the new database.
Source the new environment with '. oraenv' and verify that it has worked by issuing the following command:
echo $ORACLE_SID
If this doesn't output the new database sid go back and investigate.
* 10. Create the a password file
Use the following command to create a password file (add an appropriate password to the end of it):
orapwd file=${ORACLE_HOME}/dbs/orapw${ORACLE_SID} password=
* 11. Create the new control file(s)
Ok, now for the exciting bit! It is time to create the new controlfiles and open the database:
open new terminal and follow the steps:
[oracle@localhost ~]$ ORACLE_SID=clone
[oracle@localhost ~]$ sqlplus '/as sysdba'
SQL*Plus: Release 10.2.0.1.0 - Production on Tue May 12 18:54:56 2009
Copyright (c) 1982, 2005, Oracle. All rights reserved.
Connected to:
Oracle Database 10g Enterprise Edition Release 10.2.0.1.0 - Production
With the Partitioning, OLAP and Data Mining options
SQL> startup nomount pfile=/u01/admin/clone/pfile/init.ora
SQL> @/home/oracle/dbclone.sql
If all goes to plan you will see the instance start and then the message 'Control file created'.
* 12. Recover and open the database
The archive logs that were identified and copied in step 6 must now be applied to the database. Issue the following command from sqlplus:
SQL> recover database using BACKUP CONTROLFILE until cancel;
ORA-00279: change 542839 generated at 05/12/2009 02:38:29 needed for thread 1
ORA-00289: suggestion :
/u01/app/oracle/product/10.2.0/db_1/flash_recovery_area/CLONE/archivelog/2008_11_
25/o1_mf_1_3_%u_.arc
ORA-00280: change 542839 for thread 1 is in sequence #3
Specify log: {
IMPORTANT:You need to give the archived log name here and then say "Cancel" and open the database
/u01/app/oracle/oradata/CLONE/o1_mf_1_3_4lqgzpsg_.arc
ORA-00279: change 543072 generated at 11/25/2008 02:48:54 needed for thread 1
ORA-00289: suggestion :
/u01/app/oracle/product/10.2.0/db_1/flash_recovery_area/CLONE/archivelog/2008_11_
25/o1_mf_1_4_%u_.arc
ORA-00280: change 543072 for thread 1 is in sequence #4
ORA-00278: log file '/u01/app/oracle/oradata/CLONE/o1_mf_1_3_4lqgzpsg_.arc' no
longer needed for this recovery
Specify log: {
/u01/app/oracle/oradata/CLONE/o1_mf_1_4_4lqgzsbq_.arc
ORA-00279: change 543074 generated at 11/25/2008 02:48:57 needed for thread 1
ORA-00289: suggestion :
/u01/app/oracle/product/10.2.0/db_1/flash_recovery_area/CLONE/archivelog/2008_11_
25/o1_mf_1_5_%u_.arc
ORA-00280: change 543074 for thread 1 is in sequence #5
ORA-00278: log file '/u01/app/oracle/oradata/CLONE/o1_mf_1_4_4lqgzsbq_.arc' no
longer needed for this recovery
Specify log: {
cancel
Media recovery cancelled.
SQL> alter database open resetlogs;
AND THEN MAKE YOUR DATABASE TO ARCHIVELOG MODE
* 13. Create temp files
Using the 'ALTER TABLESPACE TEMP...' command from step 8, create the temp files. Make sure the paths to the file(s) are correct, then run it from sqlplus.
* 14. Perform a few checks
If the last couple of steps went smoothly, the database should be open. It is advisable to perform a few checks at this point:
o Check that the database has opened with:
SQL>select status from v$instance;
The status should be 'OPEN'
o Make sure that the datafiles are all ok:
SQL>select distinct status from v$datafile;
It should return only ONLINE and SYSTEM.
o Take a quick look at the alert log too.
* 15. Set the databases global name
The new database will still have the source databases global name. Run the following to reset it:
SQL>alter database rename global_name to
/
Note. no quotes!
* 16. Create a spfile
From sqlplus:
SQL>create spfile from pfile;
* 17. Change the database ID
If RMAN is going to be used to back-up the database, the database ID must be changed. If RMAN isn't going to be used, there is no harm in changing the ID anyway - and it's a good practice to do so.
From sqlplus:
SQL>shutdown immediate
SQL>startup mount
SQL>exit
From unix and linux:
nid target=/
NID will ask if you want to change the ID. Respond with 'Y'. Once it has finished, start the database up again in sqlplus:
SQL>shutdown immediate
SQL>startup mount
SQL>alter database open resetlogs
/
* 18. Configure TNS
Add entries for new database in the listener.ora and tnsnames.ora as necessary.
* 19. Finished
That's it!
Original documentation prepard by shutdownabort.com, Andrew Barry, I have made some changes in that documentation for easy understanding with the help of ASKDBA ORACLE FEED forum.
for further reference and more information:
http://www.shutdownabort.com/quickguides/clone_hot.php
http://askdba.org/forum/topic.php?id=18
Saturday, May 9, 2009
upgradation from oracle 9i to oracle 10g
Steps for Upgrading the Database to 10g Release 2
Preparing to Upgrade
Fresh Install oracle software only 10gR2 on the same 9i instance.
Oracle 9i(9.2.0.6) to Oracle 10g(10.2.0.1)
Oracle 9i home ==> /oracle/app/oracle/testdb/9.2.0
Oracle 10g home ==> /u01/app/oracle/product/10.2.0/
mkdir -p /u01/app/oracle
chown -R oracle:oinstall /u01
export ORACLE_BASE=/oracle/app/oracle
export ORACLE_HOME=/u01/app/oracle/product/10.2.0/db_1
export PATH=$PATH:$ORACLE_HOME/bin
kernel.shmall = 2097152
kernel.shmmax = 2147483648
kernel.shmmni = 4096
# semaphores: semmsl, semmns, semopm, semmni
kernel.sem = 250 32000 100 128
fs.file-max = 65536
net.ipv4.ip_local_port_range = 1024 65000
net.core.rmem_default=262144
net.core.rmem_max=262144
net.core.wmem_default=262144
net.core.wmem_max=262144
==================================
Step 1
Copy utlu102i.sql , utltzuv2.sql 10g oracle home to /tmp folder. Then run both scripts.
This scripts will show the preupgrade steps.
ORACLE_HOME ==> 10g Home
cp $ORACLE_HOME/rdbms/admin/utlu102i.sql /tmp
cp $ORACLE_HOME/rdbms/admin/utltzuv2.sql /tmp
===================================
Step 2
Then login 9i oracle home and login sql prompt. Then run that above scripts.
sqlplus '/as sysdba'
SQL> spool Database_Info.log
SQL> @utlu102i.sql
SQL> spool off
===================================
Check the log file and solve that issues.
spool Database_Info.log
Oracle Database 10.2 Upgrade Information Utility 04-23-2008 11:07:05
.
**********************************************************************
Database:
**********************************************************************
--> name: TEST
--> version: 9.2.0.6.0
--> compatible: 9.2.0
.
**********************************************************************
Logfiles: [make adjustments in the current environment]
**********************************************************************
--> The existing log files are adequate. No changes are required.
.
**********************************************************************
Tablespaces: [make adjustments in the current environment]
**********************************************************************
--> SYSTEM tablespace is adequate for the upgrade.
.... minimum required size: 8082 MB
--> TEMP tablespace is adequate for the upgrade.
.... minimum required size: 58 MB
--> APPS_TS_QUEUES tablespace is adequate for the upgrade.
.... minimum required size: 577 MB
--> APPS_TS_TX_DATA tablespace is adequate for the upgrade.
.... minimum required size: 10842 MB
--> ODM tablespace is adequate for the upgrade.
.... minimum required size: 14 MB
--> OLAP tablespace is adequate for the upgrade.
.... minimum required size: 30 MB
--> SYSAUX tablespace is adequate for the upgrade.
.... minimum required size: 109 MB
.
**********************************************************************
Update Parameters: [Update Oracle Database 10.2 init.ora or spfile]
**********************************************************************
WARNING: --> "streams_pool_size" is not currently defined and needs a value of
at least 50331648
WARNING: --> "large_pool_size" needs to be increased to at least 8388608
.
**********************************************************************
Deprecated Parameters: [Update Oracle Database 10.2 init.ora or spfile]
**********************************************************************
-- No deprecated parameters found. No changes are required.
.
**********************************************************************
Obsolete Parameters: [Update Oracle Database 10.2 init.ora or spfile]
**********************************************************************
--> "optimizer_max_permutations"
--> "row_locking"
--> "undo_suppress_errors"
--> "max_enabled_roles"
--> "enqueue_resources"
--> "sql_trace"
.
**********************************************************************
Components: [The following database components will be upgraded or installed]
**********************************************************************
--> Oracle Catalog Views [upgrade] VALID
--> Oracle Packages and Types [upgrade] VALID
--> JServer JAVA Virtual Machine [upgrade] VALID
...The 'JServer JAVA Virtual Machine' JAccelerator (NCOMP)
...is required to be installed from the 10g Companion CD.
--> Oracle XDK for Java [upgrade] VALID
--> Oracle Java Packages [upgrade] VALID
--> Oracle Text [upgrade] VALID
--> Oracle XML Database [install]
--> Real Application Clusters [upgrade] INVALID
--> Oracle Data Mining [upgrade] VALID
--> OLAP Analytic Workspace [upgrade] UPGRADED
--> OLAP Catalog [upgrade] VALID
--> Oracle OLAP API [upgrade] UPGRADED
--> Oracle interMedia [upgrade] VALID
...The 'Oracle interMedia Image Accelerator' is
...required to be installed from the 10g Companion CD.
--> Spatial [upgrade] VALID
.
**********************************************************************
Miscellaneous Warnings
**********************************************************************
WARNING: --> Passwords exist in some database links.
.... Passwords will be encrypted during the upgrade.
.... Downgrade of database links with passwords is not supported.
WARNING: --> Deprecated CONNECT role granted to some user/roles.
.... CONNECT role after upgrade has only CREATE SESSION privilege.
WARNING: --> Database contains stale optimizer statistics.
.... Refer to the 10g Upgrade Guide for instructions to update
.... statistics prior to upgrading the database.
.... Component Schemas with stale statistics:
.... SYS
.... ODM
.
**********************************************************************
SYSAUX Tablespace:
[Create tablespace in the Oracle Database 10.2 environment]
**********************************************************************
WARNING: SYSAUX tablespace is present.
.... Minimum required size for database upgrade:500 MB
.... Online
.... Permanent
.... Readwrite
.... ExtentManagementLocal
.... SegmentSpaceManagementAuto
.
=======================================
Step 3
Check the above output file and resolve the warning and failed messages
=======================================
Increase the SYSTEM tablespace
select sum(bytes/1024/1024) from dba_free_space where tablespace_name='SYSTEM';
select FILE_NAME, sum(bytes/1024/1024) from dba_data_files where TABLESPACE_NAME='SYSTEM' GROUP BY FILE_NAME;
ALTER TABLESPACE SYSTEM ADD DATAFILE '/oracle/app/oracle/testdata/sys8.dbf' SIZE 4096M;
ALTER TABLESPACE SYSTEM ADD DATAFILE '/oracle/app/oracle/testdata/sys9.dbf' SIZE 4096M;
ALTER TABLESPACE SYSTEM ADD DATAFILE '/oracle/app/oracle/testdata/sys10.dbf' SIZE 4096M;
TEMP
alter database tempfile '/oracle/app/oracle/testdata/tmp1.dbf' resize 4096M;
APPS_TS_QUEUES
select sum(bytes/1024/1024) from dba_free_space where tablespace_name='APPS_TS_QUEUES';
select FILE_NAME, sum(bytes/1024/1024) from dba_data_files where TABLESPACE_NAME='APPS_TS_QUEUES' GROUP BY FILE_NAME;
ALTER TABLESPACE APPS_TS_QUEUES ADD DATAFILE '/oracle/app/oracle/testdata/queues3.dbf' SIZE 1024M;
APPS_TS_TX_DATA
select sum(bytes/1024/1024) from dba_free_space where tablespace_name='APPS_TS_TX_DATA';
select FILE_NAME, sum(bytes/1024/1024) from dba_data_files where TABLESPACE_NAME='APPS_TS_TX_DATA' GROUP BY FILE_NAME;
ALTER TABLESPACE APPS_TS_TX_DATA ADD DATAFILE '/oracle/app/oracle/testdata/tx_data12.dbf' SIZE 4096M;
ALTER TABLESPACE APPS_TS_TX_DATA ADD DATAFILE '/oracle/app/oracle/testdata/tx_data13.dbf' SIZE 4096M;
ALTER TABLESPACE APPS_TS_TX_DATA ADD DATAFILE '/oracle/app/oracle/testdata/tx_data14.dbf' SIZE 1024M;
ODM
select sum(bytes/1024/1024) from dba_free_space where tablespace_name='ODM';
select FILE_NAME, sum(bytes/1024/1024) from dba_data_files where TABLESPACE_NAME='ODM' GROUP BY FILE_NAME;
alter database datafile '/oracle/app/oracle/testdata/odm.dbf' resize 250m;
OLAP
select sum(bytes/1024/1024) from dba_free_space where tablespace_name='OLAP';
select FILE_NAME, sum(bytes/1024/1024) from dba_data_files where TABLESPACE_NAME='OLAP' GROUP BY FILE_NAME;
alter database datafile '/oracle/app/oracle/testdata/olap.dbf' resize 250m;
CREATE TABLESPACE sysaux DATAFILE '/oracle/app/oracle/testdata/sysaux01.dbf'
SIZE 500M REUSE
EXTENT MANAGEMENT LOCAL
SEGMENT SPACE MANAGEMENT AUTO
ONLINE;
============================================
Step 4
Check for the TIMESTAMP WITH TIMEZONE Datatype.
SQL> @utltzuv2.sql
DROP TABLE sys.sys_tzuv2_temptab
*
ERROR at line 1:
ORA-00942: table or view does not exist
Table created.
Query sys.sys_tzuv2_temptab Table to see if any TIMEZONE data is affected by
version 2 transition rules
PL/SQL procedure successfully completed.
Commit complete.
=============================================
Step 5
To gather statistics run this script, connect to the database AS SYSDBA using SQL*Plus.
SQL> EXEC DBMS_STATS.GATHER_DICTIONARY_STATS;
SQL> EXEC DBMS_STATS.GATHER_SCHEMA_STATS('SYS');
SQL> EXEC DBMS_STATS.GATHER_SCHEMA_STATS('ODM');
SQL> EXEC DBMS_STATS.GATHER_SCHEMA_STATS('OLAPSYS');
SQL> EXEC DBMS_STATS.GATHER_SCHEMA_STATS('MDSYS');
.... SYS
.... ODM
.... OLAPSYS
.... MDSYS
==================================================
Step 6
REVOKE CONNECT RIGHTS TO ABOVE 12 USERS
SELECT grantee FROM dba_role_privs
WHERE granted_role = 'CONNECT' and
grantee NOT IN (
'SYS', 'OUTLN', 'SYSTEM', 'CTXSYS', 'DBSNMP',
'LOGSTDBY_ADMINISTRATOR', 'ORDSYS',
'ORDPLUGINS', 'OEM_MONITOR', 'WKSYS', 'WKPROXY',
'WK_TEST', 'WKUSER', 'MDSYS', 'LBACSYS', 'DMSYS',
'WMSYS', 'OLAPDBA', 'OLAPSVR', 'OLAP_USER',
'OLAPSYS', 'EXFSYS', 'SYSMAN', 'MDDATA',
'SI_INFORMTN_SCHEMA', 'XDB', 'ODM');
GRANTEE
=======
CFD
DMS
HCC
DGRAY
EUL_US
SSOSDK
WEBSYS
PROJMFG
SERVICES
WIRELESS
EDWEUL_US
GRANTEE
------------------------------
MOBILEADMIN
12 rows selected.
============================================
SELECT 'REVOKE CONNECT FROM 'grantee';' FROM dba_role_privs
WHERE granted_role = 'CONNECT' and
grantee NOT IN (
'SYS', 'OUTLN', 'SYSTEM', 'CTXSYS', 'DBSNMP',
'LOGSTDBY_ADMINISTRATOR', 'ORDSYS',
'ORDPLUGINS', 'OEM_MONITOR', 'WKSYS', 'WKPROXY',
'WK_TEST', 'WKUSER', 'MDSYS', 'LBACSYS', 'DMSYS',
'WMSYS', 'OLAPDBA', 'OLAPSVR', 'OLAP_USER',
'OLAPSYS', 'EXFSYS', 'SYSMAN', 'MDDATA',
'SI_INFORMTN_SCHEMA', 'XDB', 'ODM');
Take the spool on above scripts and run sql prompt.
===========================================
Remove or comment the following initparameters 10 oracle home.
Copy init.ora file 9i to 10g oracle home, Then change the parameter file.
-->"optimizer_max_permutations"
--> "row_locking"
--> "undo_suppress_errors"
--> "max_enabled_roles"
--> "enqueue_resources"
--> "sql_trace"
===========================================
Check the spool log file to Add and Increase the below parameter size
shared_pool_size=181217280
streams_pool_size=50331648
large_pool_size=8388608
===========================================
Check the free tablespace size
select tablespace_name,sum(bytes/1024/1024) from dba_free_space where tablespace_name in ('SYSTEM','APPS_TS_QUEUES','APPS_TS_TX_DATA','ODM','SYSAUX') GROUP BY TABLESPACE_NAME;
===========================================
set below env
export ORACLE_SID=TEST
export ORACLE_BASE=/u01/app/
export ORACLE_HOME=/u01/app/oracle/product/10.2.0/db_1
export PATH=$PATH:$ORACLE_HOME/bin
==========================================
After completing pre upgrade steps, you have to login 10g oracle home.
[oracle@sys43 admin]$ sqlplus "/as sysdba"
SQL*Plus: Release 10.2.0.1.0 - Production on Wed Apr 23 14:48:39 2008
Copyright (c) 1982, 2005, Oracle. All rights reserved.
Connected to an idle instance.
SQL> startup upgrade
ORACLE instance started.
Total System Global Area 473956352 bytes
Fixed Size 1220024 bytes
Variable Size 297796168 bytes
Database Buffers 163577856 bytes
Redo Buffers 11362304 bytes
Database mounted.
Database opened.
SQL> spool upgrade.log
SQL> @catupgrd.sql
Oracle Database 10.2 Upgrade Status Utility 04-23-2008 16:23:48
.
Component Status Version HH:MM:SS
Oracle Database Server VALID 10.2.0.1.0 00:48:24
JServer JAVA Virtual Machine VALID 10.2.0.1.0 00:06:07
Oracle XDK VALID 10.2.0.1.0 00:06:03
Oracle Database Java Packages VALID 10.2.0.1.0 00:00:25
Oracle Text VALID 10.2.0.1.0 00:01:08
Oracle XML Database VALID 10.2.0.1.0 00:01:30
Oracle Real Application Clusters INVALID 10.2.0.1.0 00:00:02
Oracle Data Mining VALID 10.2.0.1.0 00:00:19
OLAP Analytic Workspace VALID 10.2.0.1.0 00:00:16
OLAP Catalog VALID 10.2.0.1.0 00:01:13
Oracle OLAP API VALID 10.2.0.1.0 00:00:38
Oracle interMedia VALID 10.2.0.1.0 00:05:22
Spatial INVALID 10.2.0.1.0 00:04:21
.
Total Upgrade Time: 01:31:00
========================================
spool invalid_pre.lst
select substr(owner,1,12) owner,
substr(object_name,1,30) object,
substr(object_type,1,30) type, status from
dba_objects where status <> 'VALID';
spool off
========================================
SQL>shutdown immediate
========================================
The 9idata directory has no files
so go to following folder and run that perl scripts.
/u01/11i/uat/oracle/uatdb/10.2.0/nls/data/old/cr9idata.pl
bash-2.05b$ perl cr9idata.pl Creating directory /u01/11i/uat/oracle/uatdb/10.2.0/nls/data/9idata ... Copying files to /u01/11i/uat/oracle/uatdb/10.2.0/nls/data/9idata... Copy finished. Please reset environment variable ORA_NLS10 to /u01/11i/uat/oracle/uatdb/10.2.0/nls/data/9idata! bash-2.05b$
============================
Then normal startup
SQL>startup
============================
Compile invalid objects
SQL> @utlrp.sql
========================================
SQL> shut immediate
cp env to oracle_home_10g and edit new values
Copy tnsnames.ora, listeners.ora and sqlnet.ora 9i to new 10g orale home.
cp tns_admin(9i) to oracle 10g
Start listener
================================================
SQL>startup
================================================
SymptomsIn 10gR2, setting the environment variable ORA_NLS10 causes the following error:ERROROra-12705: cannot access nls data files or invalid environment specified ora-127
This is script cr9idata.pl located following path.
/u01/11i/uat/oracle/uatdb/10.2.0/nls/data/old
bash-2.05b$ perl cr9idata.pl
Creating directory /u01/11i/uat/oracle/uatdb/10.2.0/nls/data/9idata ...Copying files to /u01/11i/uat/oracle/uatdb/10.2.0/nls/data/9idata...Copy finished.
Please reset environment variable ORA_NLS10 to /u01/11i/uat/oracle/uatdb/10.2.0/nls/data/9idata!
===========================================================
Implement and run Autoconfig on the new Database home
1. Copy AutoConfig to the RDBMS ORACLE_HOME
Update the RDBMS ORACLE_HOME file system with the AutoConfig files by performing the following steps:
Steps:
* On the Application Tier (as the APPLMGR user):
a) Log in to the APPL_TOP environment and source the APPSORA.env file
b) Create appsutil.zip file. This will create appsutil.zip in $APPL_TOP/admin/out
perl $AD_TOP/bin/admkappsutil.pl
bash-2.05b$ perl admkappsutil.pl
Starting the generation of appsutil.zip
Log file located at /progs2/11i/uat/applmgr/uatappl/admin/log/MakeAppsUtil_09051242.log
output located at /progs2/11i/uat/applmgr/uatappl/admin/out/appsutil.zip
MakeAppsUtil completed successfully.
c) Copy or FTP the appsutil.zip file to the
* On the Database Tier (as the APPLMGR or ORACLE user):
d) cd RDBMS ORACLE_HOME
e) Source 10g CONTEXT_NAME.env file
f) unzip -o appsutil.zip
2. Generate your Database Context File. Execute the following commands to create your Database Context File:
Steps:
a) cd RDBMS ORACLE_HOME
b) CONTEXT_NAME.env
c) cd <10.1.0>/appsutil/bin
d) perl adbldxml.pl tier=db appsuser=APPSuser appspasswd=APPSpwd
perl adbldxml.pl tier=db appsuser=apps appspasswd=xxxxx
Steps:
a) cd /appsutil/bin
b) adconfig.sh contextfile=CONTEXT.XML appspass=APPSpwd
References
Complete Checklist for Manual Upgrades to 10gR2
Doc ID: Note:316889.1
Oracle Applications Release 11i with Oracle 10g Release 2 (10.2.0)
Doc ID: Note:362203.1
Note 135090.1 - Managing Rollback/Undo Segments in AUM (Automatic Undo Management)
Note 159657.1 - Complete Upgrade Checklist for Manual Upgrades from 8.X / 9.0.1 to Oracle9iR2 (9.2.0)
Note 170282.1 - PLSQL_V2_COMPATIBLITY=TRUE causes STANDARD and DBMS_STANDARD to Error at Compile
Note 263809.1 - Complete checklist for manual upgrades to 10gR1 (10.1.0.x)
Note 293658.1 - 10.1 or 10.2 Patchset Install Getting ORA-29558 JAccelerator (NCOMP) And ORA-06512
Note 316900.1 - ALERT: Oracle 10g Release 2 (10.2) Support Status and Alerts
Note 356082.1 - ORA-7445 [qmeLoadMetadata()+452] During 10.1 to 10.2 Upgrade
Note 406472.1 - Mandatory Patch 5752399 for 10.2.0.3 on Solaris 64-bit and Filesystems Managed By Veritas or Solstice Disk Suite software
Note 407031.1 - ORA-01403 no data found while running utlu102i.sql/utlu102x.sql on 8174 database
Note 412271.1 - ORA-600 [22635] and ORA-600 [KOKEIIX1] Reported While Upgrading Or Patching Databases To 10.2.0.3
Note 465951.1 - ORA-600 [kcbvmap_1] or Ora-600 [Kcliarq_2] On Startup Upgrade Moving From a 32-Bit To 64-Bit Release
Note 466181.1 - 10g Upgrade Companion
Note 471479.1 - IOT Corruptions After Upgrade from COMPATIBLE <= 9.2 to COMPATIBLE >= 10.1
Note 557242.1 - Upgrade Gives Ora-29558 Error Despite of JAccelerator Has Been Installed
Oracle Database Upgrade Guide 10g Release 2 (10.2) Part Number B14238-01
http://download.oracle.com/docs/cd/B19306_01/server.102/b14238/toc.ht
Thursday, May 7, 2009
Installing Oracle10g in Linux (RHEL4 )
Part I: Installing Linux
RHEL4
Oracle Database 10g Release 2 is certified to run the base release of RHEL4
1. Boot the server using the first CD.
* You may need to change your BIOS settings to allow booting from the CD.
2. The boot screen appears with the boot: prompt at the bottom of the screen.
* Select Enter to continue with a graphical install on the console. (For other installation methods and options, refer to the Red Hat Installation Guide.)
* The installer scans your hardware, briefly displays the Red Hat splash screen, and then begins a series of screen prompts.
3. Language Selection
* Accept the default.
4. Keyboard Configuration
* Accept the default.
5. Welcome Screen
* Click on Next.
6. Disk Partitioning Setup
* A thorough treatment of disk partitioning is beyond the scope of this guide, which assumes that you are familiar with disk partitioning methods.
(WARNING: Improperly partitioning a disk is one of the surest and fastest ways to wipe out everything on your hard disk. If you are unsure how to proceed, stop and get help, or you will risk losing data!)
This guide uses the following partitioning scheme, with ext3 for each filesystem:
The 9GB disk on the first controller (/dev/sda) will hold all Linux and Oracle software and contains the following partitions:
- 100MB /boot partition
- swap partition—Set this to at least twice the amount of RAM in the system but to no more than 2GB.
-root partition—This partition will be used for everything,
-/u01 partition-This partition will be used for oracle software installation.
-/tmp partition-This partition will be as same as the size of swap partition.
7. Boot Loader Configuration
* Accept the default.
8. Network Configuration
* It is usually best to configure database servers with a static IP address. Select Manual configuration.
9. Firewall Configuration
* For the purposes of this walk-through, no firewall is configured. Select No firewall
* Select Disabled on the "Enable SELinux" drop down list.
* Click on Proceed when the "Warning - No Firewall" window appears.
10. Additional Language Support
* Accept the default.
11. Time Zone Selection
* Choose the time settings that are appropriate for your area. Setting the system clock to UTC is usually a good practice for servers. To do so, click on System clock uses UTC.
12. Set Root Password
* Enter a password for root, and enter it again to confirm.(eg:redhat)
13. Package Installation Defaults
* Select Customize software packages to be installed.
14. Package Group Selection
* Select only the package sets shown here and leave all others unselected.
* Desktop
o X Window System
o Gnome
* Applications
o Graphical Internet (optional)
* Servers
o Do not select anything in this group.
* Development
o Development Tools
* System
o Administration Tools
o System Tools
+ Add the package 'sysstat' by clicking on the Details link and selecting "sysstat - The sar an iostat system monitoring commands." from the Optional Packages list.
* Miscellaneous
o Do not select anything in this group.
* Click on Next to proceed.
15. Installing Packages
* Software will be copied to the hard disk and installed. Change disks as prompted.
16. Congratulations
* Remove the installation media from the system, and click on Reboot .
17. The system automatically reboots and presents a new welcome screen.
* Click on Next.
18. License Agreement
* Read the license agreement. If you agree to the terms, select Yes, I agree to the License Agreement and click on Next.
19. Date and Time
* Set the Date and Time.
* If you want to use an NTP server (recommended), select Enable Network Time Protocol and enter the name of the NTP server.
20. Display
* Accept the defaults or change as required.
21. Red Hat Login
* Enter your Red Hat Network login and password or create a new one.
22. System User
* Create an account for yourself.
* Do not create an account for oracle at this time. Creating the oracle account is covered later in this section.
23. Additional CDs
* Click on Next.
24. Finish Setup
* Click on Next.
25. A graphical login screen appears.
26. Congratulations! Your RHEL4 software is now installed.
packages required for oracle 10g installation.
rpm -q binutils compat-db control-center gcc gcc-c++ glibc glibc-common \
gnome-libs libstdc++ libstdc++-devel make pdksh sysstat xscreensaver libaio openmotif21
Ex:
# rpm -q binutils compat-db control-center gcc gcc-c++ glibc glibc-common \
> gnome-libs libstdc++ libstdc++-devel make pdksh sysstat xscreensaver libaio openmotif21
binutils-2.15.92.0.2-15
compat-db-4.1.25-9
control-center-2.8.0-12.rhel4.2
gcc-3.4.4-2
gcc-c++-3.4.4-2
glibc-2.3.4-2.13
glibc-common-2.3.4-2.13
gnome-libs-1.4.1.2.90-44.1
libstdc++-3.4.4-2
libstdc++-devel-3.4.4-2
make-3.80-5
pdksh-5.2.14-30.3
sysstat-5.0.5-1
xscreensaver-4.18-5.rhel4.9
libaio-0.3.103-3
Part II: Configuring Linux for Oracle
Now that the Linux software is installed, you need to configure it for Oracle. This section walks through the steps required to configure Linux for Oracle Database 10g Release 2.
Create the Oracle Groups and User Account:
Create the Linux groups and user account that will be used to install and maintain the Oracle Database 10g Release 2 software. The user account will be called oracle, and the groups will be oinstall and dba. Execute the following commands as root:
/usr/sbin/groupadd oinstall
/usr/sbin/groupadd dba
/usr/sbin/useradd -m -g oinstall -G dba oracle
id oracle
Ex:
# /usr/sbin/groupadd oinstall
# /usr/sbin/groupadd dba
# /usr/sbin/useradd -m -g oinstall -G dba oracle
# id oracle
uid=501(oracle) gid=502(oinstall) groups=502(oinstall),503(dba)
Set the password on the oracle account:
passwd oracle
Ex:
# passwd oracle
Changing password for user oracle.
New password:
Retype new password:
passwd: all authentication tokens updated successfully.
Create Directories:
Now create directories to store the Oracle Database 10g Release 2 software and the database files.
Issue the following commands as root:
mkdir -p /u01/app/oracle
chown -R oracle:oinstall /u01/app/oracle
chmod -R 775 /u01/app/oracle
Ex:
# mkdir -p /u01/app/oracle
# chown -R oracle:oinstall /u01/app/oracle
# chmod -R 775 /u01/app/oracle
Configuring the Linux Kernel Parameters:
The Linux kernel is a wonderful thing. Unlike most other *NIX systems, Linux allows modification of most kernel parameters while the system is up and running. There's no need to reboot the system after making kernel parameter changes. Oracle Database 10g Release 2 requires the kernel parameter settings shown below. The values given are minimums, so if your system uses a larger value, don't change it.
#vi /etc/sysctl.conf file add the lines to the end of the sysctl.conf file
kernel.shmall = 2097152
kernel.shmmax = 2147483648
kernel.shmmni = 4096
# semaphores: semmsl, semmns, semopm, semmni
kernel.sem = 250 32000 100 128
fs.file-max = 65536
net.ipv4.ip_local_port_range = 1024 65000
net.core.rmem_default=262144
net.core.rmem_max=262144
net.core.wmem_default=262144
net.core.wmem_max=262144
Run the following command to change the current kernel parameters.
/sbin/sysctl -p
Login as the oracle user and add the following lines at the end of the .bash_profile file.
# Oracle Settings
TMP=/tmp; export TMP
TMPDIR=$TMP; export TMPDIR
ORACLE_BASE=/u01/app/oracle; export ORACLE_BASE
ORACLE_HOME=$ORACLE_BASE/product/10.2.0/db_1; export ORACLE_HOME
ORACLE_SID=RAC1; export ORACLE_SID
ORACLE_TERM=xterm; export ORACLE_TERM
PATH=/usr/sbin:$PATH; export PATH
PATH=$ORACLE_HOME/bin:$PATH; export PATH
LD_LIBRARY_PATH=$ORACLE_HOME/lib:/lib:/usr/lib; export LD_LIBRARY_PATH
CLASSPATH=$ORACLE_HOME/JRE:$ORACLE_HOME/jlib:$ORACLE_HOME/rdbms/jlib; export CLASSPATH
if [ $USER = "oracle" ]; then
if [ $SHELL = "/bin/ksh" ]; then
ulimit -p 16384
ulimit -n 65536
else
ulimit -u 16384 -n 65536
fi
fi
Part III: Installing Oracle
Oracle Database 10g Release 2 can be downloaded from OTN. Oracle offers a development and testing license free of charge. However, no support is provided and the license does not permit production use. A full description of the license agreement is available on OTN.
The easiest way to make the Oracle Database 10g Release 2 distribution media available on your server is to download them directly to the server.
Use the graphical login to log in as oracle.
Create a directory to contain the Oracle Database 10g Release 2 distribution:
mkdir 10gR2_db
To download Oracle Database 10g Release 2 from OTN, point your browser (Firefox works well) to http://www.oracle.com/technology/software/products/database/oracle10g/htdocs/10201linuxsoft.html
please copy and paste the above url and try it, if it is not directly connected.
Fill out the Eligibility Export Restrictions page, and read the OTN License agreement. If you agree with the restrictions and the license agreement, click on I Accept.
Click on the 10201_database_linux32.zip link, and save the file in the directory you created for this purpose (10gR2_db)—if you have not already logged in to OTN, you may be prompted to do so at this point.
Unzip and extract the file:
cd 10gR2_db
unzip 10201_database_linux32.zip
Install the Software and Create a Database
Log in using the oracle account.
Change directory to the location where you extracted the Oracle Database 10g Release 2 software.
Ex:
$ cd $HOME/10gR2_db
Change directory to Disk1.
Ex:
$ cd database
Start the Oracle Universal Installer.
$ ./runInstaller
1.Select Installation Method
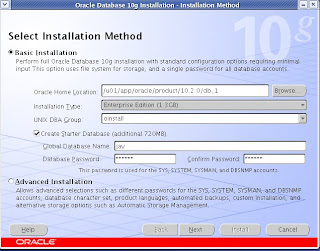 Enter the required fields and click Next button
2.Specify Inventory Directory and Credentials
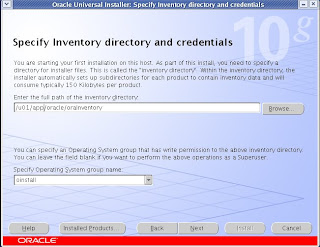 Enter the required fields and click Next button.
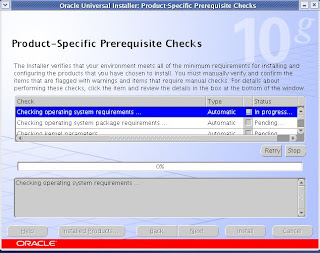 click Next button to proceed, if any error or warning occurs correct it and proceed.
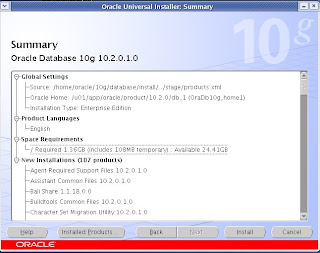 click Install button.
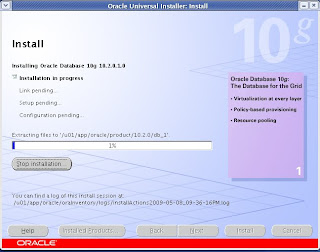
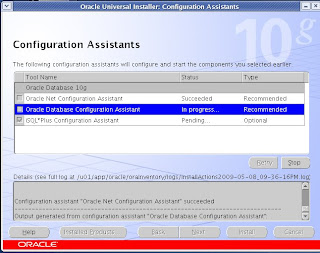
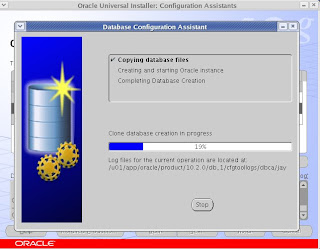
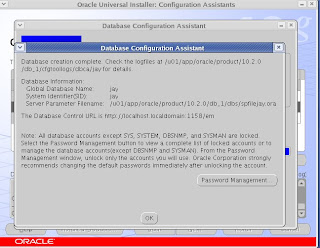
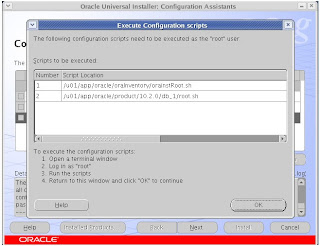 connect as root, currently you are in oracle user.
so open terminal
[oracle@localhost ~]$ su -
Password:
[root@localhost ~]# cd /u01/app/oracle/oraInventory/
[root@localhost oraInventory]# ./orainstRoot.sh
[oracle@localhost ~]$ su -
Password:
[root@localhost ~]# cd /u01/app/oracle/product/10.2.0/db_1/
[root@localhost db_1]# ./root.sh
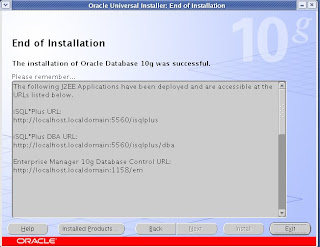 now you can connect and work with oracle database using SQL*Plus or oem.
Regards,
Rajeshkumar
RHEL4
Oracle Database 10g Release 2 is certified to run the base release of RHEL4
1. Boot the server using the first CD.
* You may need to change your BIOS settings to allow booting from the CD.
2. The boot screen appears with the boot: prompt at the bottom of the screen.
* Select Enter to continue with a graphical install on the console. (For other installation methods and options, refer to the Red Hat Installation Guide.)
* The installer scans your hardware, briefly displays the Red Hat splash screen, and then begins a series of screen prompts.
3. Language Selection
* Accept the default.
4. Keyboard Configuration
* Accept the default.
5. Welcome Screen
* Click on Next.
6. Disk Partitioning Setup
* A thorough treatment of disk partitioning is beyond the scope of this guide, which assumes that you are familiar with disk partitioning methods.
(WARNING: Improperly partitioning a disk is one of the surest and fastest ways to wipe out everything on your hard disk. If you are unsure how to proceed, stop and get help, or you will risk losing data!)
This guide uses the following partitioning scheme, with ext3 for each filesystem:
The 9GB disk on the first controller (/dev/sda) will hold all Linux and Oracle software and contains the following partitions:
- 100MB /boot partition
- swap partition—Set this to at least twice the amount of RAM in the system but to no more than 2GB.
-root partition—This partition will be used for everything,
-/u01 partition-This partition will be used for oracle software installation.
-/tmp partition-This partition will be as same as the size of swap partition.
7. Boot Loader Configuration
* Accept the default.
8. Network Configuration
* It is usually best to configure database servers with a static IP address. Select Manual configuration.
9. Firewall Configuration
* For the purposes of this walk-through, no firewall is configured. Select No firewall
* Select Disabled on the "Enable SELinux" drop down list.
* Click on Proceed when the "Warning - No Firewall" window appears.
10. Additional Language Support
* Accept the default.
11. Time Zone Selection
* Choose the time settings that are appropriate for your area. Setting the system clock to UTC is usually a good practice for servers. To do so, click on System clock uses UTC.
12. Set Root Password
* Enter a password for root, and enter it again to confirm.(eg:redhat)
13. Package Installation Defaults
* Select Customize software packages to be installed.
14. Package Group Selection
* Select only the package sets shown here and leave all others unselected.
* Desktop
o X Window System
o Gnome
* Applications
o Graphical Internet (optional)
* Servers
o Do not select anything in this group.
* Development
o Development Tools
* System
o Administration Tools
o System Tools
+ Add the package 'sysstat' by clicking on the Details link and selecting "sysstat - The sar an iostat system monitoring commands." from the Optional Packages list.
* Miscellaneous
o Do not select anything in this group.
* Click on Next to proceed.
15. Installing Packages
* Software will be copied to the hard disk and installed. Change disks as prompted.
16. Congratulations
* Remove the installation media from the system, and click on Reboot .
17. The system automatically reboots and presents a new welcome screen.
* Click on Next.
18. License Agreement
* Read the license agreement. If you agree to the terms, select Yes, I agree to the License Agreement and click on Next.
19. Date and Time
* Set the Date and Time.
* If you want to use an NTP server (recommended), select Enable Network Time Protocol and enter the name of the NTP server.
20. Display
* Accept the defaults or change as required.
21. Red Hat Login
* Enter your Red Hat Network login and password or create a new one.
22. System User
* Create an account for yourself.
* Do not create an account for oracle at this time. Creating the oracle account is covered later in this section.
23. Additional CDs
* Click on Next.
24. Finish Setup
* Click on Next.
25. A graphical login screen appears.
26. Congratulations! Your RHEL4 software is now installed.
packages required for oracle 10g installation.
rpm -q binutils compat-db control-center gcc gcc-c++ glibc glibc-common \
gnome-libs libstdc++ libstdc++-devel make pdksh sysstat xscreensaver libaio openmotif21
Ex:
# rpm -q binutils compat-db control-center gcc gcc-c++ glibc glibc-common \
> gnome-libs libstdc++ libstdc++-devel make pdksh sysstat xscreensaver libaio openmotif21
binutils-2.15.92.0.2-15
compat-db-4.1.25-9
control-center-2.8.0-12.rhel4.2
gcc-3.4.4-2
gcc-c++-3.4.4-2
glibc-2.3.4-2.13
glibc-common-2.3.4-2.13
gnome-libs-1.4.1.2.90-44.1
libstdc++-3.4.4-2
libstdc++-devel-3.4.4-2
make-3.80-5
pdksh-5.2.14-30.3
sysstat-5.0.5-1
xscreensaver-4.18-5.rhel4.9
libaio-0.3.103-3
Part II: Configuring Linux for Oracle
Now that the Linux software is installed, you need to configure it for Oracle. This section walks through the steps required to configure Linux for Oracle Database 10g Release 2.
Create the Oracle Groups and User Account:
Create the Linux groups and user account that will be used to install and maintain the Oracle Database 10g Release 2 software. The user account will be called oracle, and the groups will be oinstall and dba. Execute the following commands as root:
/usr/sbin/groupadd oinstall
/usr/sbin/groupadd dba
/usr/sbin/useradd -m -g oinstall -G dba oracle
id oracle
Ex:
# /usr/sbin/groupadd oinstall
# /usr/sbin/groupadd dba
# /usr/sbin/useradd -m -g oinstall -G dba oracle
# id oracle
uid=501(oracle) gid=502(oinstall) groups=502(oinstall),503(dba)
Set the password on the oracle account:
passwd oracle
Ex:
# passwd oracle
Changing password for user oracle.
New password:
Retype new password:
passwd: all authentication tokens updated successfully.
Create Directories:
Now create directories to store the Oracle Database 10g Release 2 software and the database files.
Issue the following commands as root:
mkdir -p /u01/app/oracle
chown -R oracle:oinstall /u01/app/oracle
chmod -R 775 /u01/app/oracle
Ex:
# mkdir -p /u01/app/oracle
# chown -R oracle:oinstall /u01/app/oracle
# chmod -R 775 /u01/app/oracle
Configuring the Linux Kernel Parameters:
The Linux kernel is a wonderful thing. Unlike most other *NIX systems, Linux allows modification of most kernel parameters while the system is up and running. There's no need to reboot the system after making kernel parameter changes. Oracle Database 10g Release 2 requires the kernel parameter settings shown below. The values given are minimums, so if your system uses a larger value, don't change it.
#vi /etc/sysctl.conf file add the lines to the end of the sysctl.conf file
kernel.shmall = 2097152
kernel.shmmax = 2147483648
kernel.shmmni = 4096
# semaphores: semmsl, semmns, semopm, semmni
kernel.sem = 250 32000 100 128
fs.file-max = 65536
net.ipv4.ip_local_port_range = 1024 65000
net.core.rmem_default=262144
net.core.rmem_max=262144
net.core.wmem_default=262144
net.core.wmem_max=262144
Run the following command to change the current kernel parameters.
/sbin/sysctl -p
Login as the oracle user and add the following lines at the end of the .bash_profile file.
# Oracle Settings
TMP=/tmp; export TMP
TMPDIR=$TMP; export TMPDIR
ORACLE_BASE=/u01/app/oracle; export ORACLE_BASE
ORACLE_HOME=$ORACLE_BASE/product/10.2.0/db_1; export ORACLE_HOME
ORACLE_SID=RAC1; export ORACLE_SID
ORACLE_TERM=xterm; export ORACLE_TERM
PATH=/usr/sbin:$PATH; export PATH
PATH=$ORACLE_HOME/bin:$PATH; export PATH
LD_LIBRARY_PATH=$ORACLE_HOME/lib:/lib:/usr/lib; export LD_LIBRARY_PATH
CLASSPATH=$ORACLE_HOME/JRE:$ORACLE_HOME/jlib:$ORACLE_HOME/rdbms/jlib; export CLASSPATH
if [ $USER = "oracle" ]; then
if [ $SHELL = "/bin/ksh" ]; then
ulimit -p 16384
ulimit -n 65536
else
ulimit -u 16384 -n 65536
fi
fi
Part III: Installing Oracle
Oracle Database 10g Release 2 can be downloaded from OTN. Oracle offers a development and testing license free of charge. However, no support is provided and the license does not permit production use. A full description of the license agreement is available on OTN.
The easiest way to make the Oracle Database 10g Release 2 distribution media available on your server is to download them directly to the server.
Use the graphical login to log in as oracle.
Create a directory to contain the Oracle Database 10g Release 2 distribution:
mkdir 10gR2_db
To download Oracle Database 10g Release 2 from OTN, point your browser (Firefox works well) to http://www.oracle.com/technology/software/products/database/oracle10g/htdocs/10201linuxsoft.html
please copy and paste the above url and try it, if it is not directly connected.
Fill out the Eligibility Export Restrictions page, and read the OTN License agreement. If you agree with the restrictions and the license agreement, click on I Accept.
Click on the 10201_database_linux32.zip link, and save the file in the directory you created for this purpose (10gR2_db)—if you have not already logged in to OTN, you may be prompted to do so at this point.
Unzip and extract the file:
cd 10gR2_db
unzip 10201_database_linux32.zip
Install the Software and Create a Database
Log in using the oracle account.
Change directory to the location where you extracted the Oracle Database 10g Release 2 software.
Ex:
$ cd $HOME/10gR2_db
Change directory to Disk1.
Ex:
$ cd database
Start the Oracle Universal Installer.
$ ./runInstaller
1.Select Installation Method
 Enter the required fields and click Next button
2.Specify Inventory Directory and Credentials
 Enter the required fields and click Next button.
 click Next button to proceed, if any error or warning occurs correct it and proceed.
 click Install button.


 connect as root, currently you are in oracle user.
so open terminal
[oracle@localhost ~]$ su -
Password:
[root@localhost ~]# cd /u01/app/oracle/oraInventory/
[root@localhost oraInventory]# ./orainstRoot.sh
[oracle@localhost ~]$ su -
Password:
[root@localhost ~]# cd /u01/app/oracle/product/10.2.0/db_1/
[root@localhost db_1]# ./root.sh
 now you can connect and work with oracle database using SQL*Plus or oem.
Regards,
Rajeshkumar
Subscribe to:
Posts (Atom)

